
















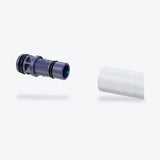


If a radiator stays cold despite being bled, or can no longer be controlled at the thermostat, the fault is often in the valve insert. This is the replaceable upper part of the radiator valve: the thermostatic head screws onto it, and its valve pin opens and closes the flow. Here is how to narrow down the fault, identify a suitable insert and carry out the replacement.
Is it really the valve insert?
- Bleed it first. If the radiator gurgles or is cold at the top, air is usually the cause: Bleeding a radiator.
- Unscrew the thermostatic head. Underneath, you will see the insert's valve pin.
- Check the pin. Press it in gently. It must spring back out by itself. If it stays in, the valve is stuck and the radiator receives no heating water.
- Free it or replace it. A stuck pin can often be freed by carefully moving it back and forth. If it keeps sticking or water leaks from the insert, replace the insert.
If several radiators in the house heat up unevenly, the settings of the whole system are a more likely cause: Hydraulic balancing.
Which valve insert fits?
Valve inserts are not standardised. Each valve manufacturer has its own designs, lengths and threads, and even within one brand there are old and new versions. Proceed as follows:
- Read the brand and model: There is often a stamped marking on the valve body or insert. Photograph it.
- Valve-integrated panel radiator: Here the valve sits inside the radiator itself. The radiator manufacturer and model are on the rating plate or in the documentation.
- Compare the old insert: The screw-in thread, length and connection for the thermostatic head must match. If you have already removed it, bring it along for comparison.
Without draining the water?
The insert sits in the water-carrying part of the valve. It may only be replaced when no more pressurised heating water can reach that point. If the radiator can be isolated on both flow and return, for example at the H-block valve underneath a valve-integrated panel radiator, it is enough to isolate the radiator and release the residual pressure. Without isolation, the system must be depressurised and heating water drained. This must be done by a qualified installer.
Tools and materials
- A suitable open-ended or ring spanner for the insert; measure the spanner size on the insert
- A bucket or shallow bowl and cloths
- A radiator bleed key
- The correct new valve insert
Replacement step by step
- Let the heating cool down. Heating water may be hot and under pressure.
- Unscrew the thermostatic head.
- Isolate the radiator. Close the flow and return. Without isolation: stop and call a qualified installer.
- Release the residual pressure. Place a bowl underneath and carefully open the radiator's air vent until no more water flows out.
- Unscrew the old insert. Hold a cloth and bowl beneath the valve, as some water may still come out.
- Clean the seat. Remove dirt from the thread and sealing surface in the valve body.
- Screw in the new insert. Position it squarely, screw it in by hand, then tighten with the spanner without overtightening. If it has a presetting, set this according to the manufacturer's instructions or the installer's value.
- Open the isolating valves and check for leaks. There must be no water leaking from the insert.
- Bleed and check the pressure. Bleed the radiator and compare the pressure on the system's gauge with the target value; if water is missing, it must be topped up.
- Screw the thermostatic head back on and check operation: the radiator must get warm and respond to the thermostat.
A new valve-integrated panel radiator instead of a new insert?
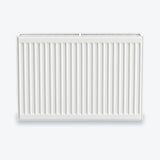
If the radiator is old or a suitable insert is no longer available, a new valve-integrated panel radiator may be the better solution. Our Type 22 and Type 33 valve-integrated panel radiators include a valve insert, which is not pre-fitted, along with wall brackets with plugs and screws, a blanking plug and an air vent plug. The bottom connections are 1/2 inch, spaced 50 mm apart, matching our two-pipe H-block valve, which allows the radiator to be isolated later. Our thermostatic head has an M30 × 1.5 connection thread; we confirm whether it fits your valve with the quotation. All sizes are in the guide Type 22 and Type 33 radiator dimensions; how to connect the flow and return at the bottom is explained in Bottom radiator connection. How presetting works on the thermostatic valve is explained in the guide Thermostatic valves and presetting.
Safety
Never work on a valve that is still under pressure: the insert may come loose and hot water will escape. If you are unsure whether your radiator is safely isolated, or water needs draining, employ a qualified installer.
At AKKAYA in Hagen
We supply thermostatic heads and H-block valves as radiator accessories, for collection following an enquiry from the warehouse at Im Mühlenwert 22 in Hagen. Valve inserts are available on enquiry; we check which insert suits your radiator. Send a photo of your old insert or the rating plate so we can clarify compatibility beforehand. Advice is available in the shop at Eilper Straße 29.
If the valve insert is not the cause, you will find all the possible causes in order in the guide Radiator not getting warm.
Radiator accessories · Valve-integrated panel radiators · Bleeding a radiator
Frequently asked questions
Can I replace the valve insert without draining the water?
Only if the radiator can be isolated on both flow and return, for example at the H-block valve underneath a valve-integrated panel radiator. It is then enough to isolate it and release the residual pressure. Without isolation, the system must be depressurised; this must be done by a qualified installer.
How do I recognise a sticking valve pin?
Unscrew the thermostatic head and press the pin in gently. It must spring back out by itself. If it stays in, the valve is stuck and the radiator receives no heating water.
Does every valve insert fit every radiator?
No. Valve inserts are not standardised; the thread, length and connection for the thermostatic head differ by manufacturer and version. Compare the old insert or send us a photo of the insert or rating plate.